Learning to Cook

I have always been surrounded by wonderful cooks and bakers. While this has been delightful for my taste buds, I always wondered if I would ever be able to cook like them. When I lived in Brazil, I was forced to learn how to cook because the ingredients at my disposal were so different. The experience was, at first, frustrating. But, once I began to experiment, the world of cooking opened up to me. My recipe box is now brimming, and I thought others might be interested in trying some of the recipes I have found. I haven’t tried them all yet, but I plan to in the future! I hope you enjoy, and please feel free to add your own suggestions/comments.
Showing posts with label Desserts. Show all posts

Tuesday, August 18, 2009

Triple-Berry Popsicles

We couldn't believe how simple it was to make these frozen treats. You can strain out the seeds if you like, but we love the texture they lend to the popsicles. Feel free to use boysenberries, pitted cherries, or other favorites instead of the combination of fruits here. Prep and Cook Time: 20 minutes, plus at least 8 hours of freezing time. Notes: Simple syrup (sugar water) makes the popsicles less icy and more velvety than sugar alone. (If you don't have time to make the syrup, just add 1/3 cup undissolved sugar to the purée in step 2.) You will need 10 (4-oz.) popsicle molds and 10 popsicle sticks for this recipe.

Yield
Makes 10 popsicles

Ingredients
2/3 cup sugar (see Notes)
1 cup blueberries
1 cup strawberries, hulled and sliced
1 cup raspberries
1/4 cup fresh lemon juice
Preparation
1. Put sugar and 1/3 cup water in a small saucepan and bring to boil over high heat, stirring until sugar is dissolved. Set aside.

2. Combine blueberries, strawberries, raspberries, and lemon juice in a blender and purée until smooth, about 30 seconds. Add 1/3 cup simple syrup and blend just until combined. (Save remaining syrup for another use, such as sweetening iced tea.)

3. Transfer purée to popsicle molds (see Notes) and freeze 4 hours. Insert popsicle sticks and freeze an additional 4 to 6 hours, or until frozen solid.

Note: Nutritional analysis is per popsicle.

Nutritional Information
Calories:44 (4% from fat)
Protein:0.3g
Fat:0.2g (sat 0.0)
Carbohydrate:11g
Fiber:1.3g
Sodium:6.4mg
Cholesterol:0.0mg

http://find.myrecipes.com/recipes/recipefinder.dyn?action=displayRecipe&recipe_id=1816280

Saturday, May 16, 2009

Orange-Pineapple Carrot Cake

2 cups all purpose flour
2 teaspoons baking powder
2 teaspoons ground cinnamon
1 1/2 teaspoons baking soda
1 teaspoon salt
2 cups sugar
4 large eggs
1/2 cup frozen pineapple-orange juice + some orange zest)
1/2 cup sour cream
1/2 cup vegetable oil
2 cups grated carrots
1 8 1/2-ounce can crushed pineapple in juice, well drained (have second can available for frosting)
1/2 cup raisins (optional)
1/2 cup chopped macadamia nuts (optional)

1 1/2 8-ounce packages cream cheese, room temperature
1/2 cup (1 stick) unsalted butter, room temperature
2 cups powdered sugar

Preheat oven to 350°F. Butter and flour 13x9x2-inch metal baking pan. Combine first 5 ingredients in medium bowl; whisk to blend. Using an electric mixer, beat 2 cups sugar, eggs, 1/2 cup juice concentrate, sour cream, and vegetable oil in large bowl until smooth. Beat in dry ingredients; stir in carrots, pineapple, raisins, and nuts. Pour batter into prepared pan. Bake cake until tester inserted into center comes out clean, about 50 minutes. Cool cake completely in pan.

Combine cream cheese, butter, and 1/4 cup crushed pineapple in a medium bowl. Beat until blended. Add powdered sugar and beat until smooth. Spread frosting over cake. (Can be prepared 2 days ahead. Chill until frosting sets, then cover and keep chilled.)

Adapted from: http://www.epicurious.com/recipes/food/views/Orange-Pineapple-Carrot-Cake-106437

Sunday, January 18, 2009

Light Crumb Cake

This cake is good. It's not just good, it's Low Fat People. The normal serving of coffee cake has on average 14 grams of fat and 320 calories per serving, this one, a mere 5 grams of fat and 210 calories per serving. Sweet!

Recipe:
Nonstick baking spray with flour
1 1/2 C unbleached all-purpose flour
1/2 C cake flour
3/4 C packed light brown sugar
1/2 tsp salt
1/2 tsp baking powder
1/4 tsp baking soda
1 tsp ground cinnamon
3 tbsp unsalted butter softened, plus 1 tbsp melted and cooled
1/2 C granulated sugar
2 large eggs
1 tsp vanilla extract
3/4 C plain low-fat yogurt

1. Adjust an oven rack to the middle position and heat the oven to 350 degrees. Spray an 8-inch square baking pan with the nonstick baking spray. Whisk the all purpose flour, cake flour, 1/2 cup of the brown sugar, salt, baking powder and baking soda together in a medium bowl. Remove 1/4 cup of the flour mixture and mix it with the remaining 1/4 cup of brown sugar and the cinnamon in a small bowl; set aside.

2. Beat the 3 tablespoons of softened butter and the granulated sugar together with an electric mixer on medium-high speed until light and fluffy, 3 to 5 minutes, scraping down the sides of the bowl with a rubber satula as needed. Add the eggs one at a time, beating well after each addition.

3. Reduce the mixer speed to low. Beat in one-third of the flour mixture until just incorporated, followed by the vanilla and one-third of the yogurt , scraping down the bowl as needed. Repeat this process twice more, alternating between the remaining flour mixture and yogurt until the ingredients are just incorporated. Do not overmix.

4. Scrape the cake batter into the prepared baking pan. Stir the 1 tablespoon melted butter into the reserved cinnamon mixture and toss gently with a fork until the butter is evenly distributed creating some pea-sized crumbs. Sprinkle the crumb mixture evenly over the batter.

5. Bake until golden brown and a toothpick inserted in the center of the cake comes out with a few crumbs attached, 35 to 40 minutes, rotating the pan half way through baking. Transfer the baking pan to a wire rack and let the cake cool completely before cutting into squares.

Per Serving: Calories: 210; Fat: 5g; Sat Fat: 3g; Chol: 45 mg; Carb:38g; Protein: 4g; Fiber:1g; Sodium: 150mg

Monday, November 24, 2008

Rabanada de Natal


Ingredientes:

• 2 gemas
• 3 colheres de sopa de açúcar branco
• 1 colher de leite
• 1 colher de nata
• baunilha em pó (opcional)
• 12 fatias de pão de véspera
• óleo
• açúcar em pó
• canela moída
• frutas frescas

Coloque as gemas dentro de uma tigela e junte o açúcar. Bata a gemada até obter um creme macio e espesso. Adicione aos poucos o leite e a nata. Bata um pouco mais e aromatize com 1 colher de café de baunilha em pó (opcional). Bata novamente. Molhe o pão com esta mistura e deixe embeber durante alguns minutos. Aqueça bastante óleo numa frigideira ou num recipiente fundo. Frite as fatias, poucas de cada vez, virando-as até dourarem uniformemente. Retire da fritura com uma escumadeira e escorra o excedente da gordura sobre folhas de papel absorvente. Polvilhe as rabanadas ainda quentes com açúcar e canela. Acompanhe com tiras finas de fruta fresca.

Sunday, October 19, 2008

French Silk Pie


Bittersweet chocolate and Dutch-process cocoa meld with a shot of fresh brewed coffee to give an ultra-rich flavor to this creamy French silk pie.

Makes 10 servings

ACTIVE TIME: 30 minutes

TOTAL TIME: 4 1/4 hours (including chilling time)

EASE OF PREPARATION: Moderate

Crust
30 chocolate wafers (see Makeover Tip)
2 tablespoons chopped pitted dates
2 tablespoons water
1 tablespoon canola oil

Filling
1 tablespoon brewed coffee
1 tablespoon water
1 1/2 teaspoons unflavored gelatin
1 large egg
1/2 cup low-fat milk
8 tablespoons packed light brown sugar, divided
1/3 cup unsweetened cocoa powder, preferably Dutch-process
2 ounces bittersweet chocolate, chopped
1 1/2 teaspoons vanilla extract
2 tablespoons dried egg whites (see Ingredient Note), reconstituted according to package directions
1/2 teaspoon cream of tartar

1. Preheat oven to 325°F. Coat a 9-inch deep-dish pie pan with cooking spray.
2. To prepare crust: Combine chocolate wafers and dates in a food processor; process until finely chopped. Add water and oil and process until moistened. Press into the bottom and sides of the prepared pan.
3. Bake the crust until crisp, about 10 minutes. Cool completely on a wire rack.
4. To prepare filling & garnish: Combine coffee and water in a small bowl. Sprinkle gelatin on top and set aside to soften.
5. Whisk egg, milk, 3 tablespoons brown sugar and cocoa in a small saucepan until smooth. Cook over low heat, whisking constantly, until thickened and an instant-read thermometer registers 160°F, 5 to 7 minutes. Do not let the mixture come to a simmer. Remove from the heat. Add the reserved gelatin mixture; stir until dissolved. Add chocolate and vanilla, stirring until melted. Set aside to cool to room temperature, about 30 minutes.
6. Beat reconstituted egg whites and cream of tartar in a large bowl with an electric mixer on low speed until frothy. Increase speed to high and beat until soft peaks form. Gradually add the remaining 5 tablespoons brown sugar, beating until the meringue is smooth and glossy.
7. Whisk one-fourth of the meringue into the cooled chocolate mixture until smooth. Scrape the chocolate mixture into the remaining meringue and fold in with a whisk. Spoon the filling into the crust and chill, uncovered, until set, about 3 hours.

NUTRITION INFORMATION: Per serving: 172 calories; 6 g fat (1 g sat, 1 g mono); 22 mg cholesterol; 29 g carbo hydrate; 4 g protein; 2 g fiber; 88 mg sodium; 106 mg potassium.
2 Carbohydrate Servings
Exchanges: 1 1/2 other carbohydrate, 1 fat

TIP: Makeover tip: Many commercial cookies and wafers contain partially hydrogenated oil, a source of trans-fatty acids. Look for brands made without these oils, such as Newman’s Own Organics and Mi-Del, which fortunately are every bit as tasty. Find them in the natural-foods section of large supermarkets.

Ingredient note: Dried egg whites, such as Just Whites, reconstituted, can be substituted for fresh egg whites.

MAKE AHEAD TIP: Cover and refrigerate for up to 2 days. | Equipment: 9-inch deep-dish pie pan

Deep-Dish Apple Pie


Whole-wheat pastry flour adds a bit more fiber to the crust of our healthy apple pie. We lowered the fat by replacing some of the butter with canola oil. To achieve a juicy filling with plenty of tender bits of apple, we combine two types of tart-sweet apples, then precook part of the filling before adding it to the pie shell to avoid that unfortunate hollow spot that can occur when the filling shrinks away from the top.

Makes 10 servings

ACTIVE TIME: 1 1/4 hours

TOTAL TIME: 4 hours (including cooling time)

EASE OF PREPARATION: Easy

Crust
1 1/4 cups whole-wheat pastry flour
1 1/4 cups all-purpose flour
2 tablespoons granulated sugar, plus 1 teaspoon for sprinkling
1/2 teaspoon salt
4 tablespoons cold unsalted butter
1/4 cup reduced-fat sour cream
3 tablespoons canola oil
4 tablespoons ice water
1 egg white, lightly beaten, for brushing

Filling
6 cups thinly sliced peeled McIntosh apples (about 2 pounds) (see Tip)
6 cups thinly sliced peeled Granny Smith apples (about 2 pounds) (see Tip)
2/3 cup packed light brown sugar
1 tablespoon lemon juice
1 1/4 teaspoons ground cinnamon, divided
1/8 teaspoon ground nutmeg
Pinch of ground allspice
Pinch of salt
2 tablespoons all-purpose flour

1. To prepare crust: Whisk whole-wheat flour, all-purpose flour, 2 tablespoons sugar and salt in a large bowl. Cut butter into small pieces and, with your fingers, quickly rub them into the dry ingredients until the pieces are smaller but still visible. Add sour cream and oil; toss with a fork to combine with the dry ingredients. Sprinkle water over the mixture. Toss with a fork until evenly moist. Knead the dough with your hands in the bowl a few times—the mixture will still be a little crumbly. Turn out onto a clean surface and knead a few more times, until the dough just holds together. Divide the dough in half and shape into 5-inch-wide disks. Wrap each in plastic and refrigerate for 1 hour.
2. To prepare filling: Combine apples, brown sugar, lemon juice, 1 teaspoon cinnamon, nutmeg, allspice and salt in a large bowl. Reserving 4 cups, transfer the rest of the apple mixture to a Dutch oven. Cook over medium heat, stirring, until the apples are tender and beginning to break down, about 10 minutes. Remove from the heat, stir in the reserved apples and 2 tablespoons flour; let cool for about 30 minutes.
3. To assemble & bake pie: Position a rack in the lower third of the oven; preheat to 425°F.
4. Remove the dough from the refrigerator; let stand for 5 minutes to warm slightly. Roll one portion between sheets of parchment or wax paper into a 13-inch circle. Peel off the top sheet and invert the dough into a 9 1/2-inch deep-dish pie pan. Peel off the remaining paper. Scrape the filling into the crust. Roll the remaining portion of dough between sheets of parchment or wax paper into another 13-inch circle. Peel off the top sheet of paper and invert the dough onto the fruit. Peel off the remaining paper. Trim the crust so it overhangs evenly. Tuck the top crust under the bottom crust, sealing the two together and making a plump edge. Flute the edge with your fingers. Combine remaining 1 teaspoon of granulated sugar and the remaining 1/4 teaspoon cinnamon in a small bowl. Brush the crust with egg white and sprinkle with the cinnamon-sugar. Cut 6 steam vents in the top crust.
5. Bake the pie for 20 minutes; reduce the oven temperature to 375° and continue baking until the crust is golden brown and the filling is bubbling, 25 to 35 minutes more. Let cool on a wire rack for about 1 1/2 hours before serving.

NUTRITION INFORMATION: Per serving: 352 calories; 10 g fat (4 g sat, 3 g mono); 14 mg cholesterol; 65 g carbohydrate; 4 g protein; 7 g fiber; 153 mg sodium; 234 mg potassium.
Nutrition bonus: Vitamin C (15% daily value).
4 Carbohydrate Servings
Exchanges: 2 starch, 2 fruit, 2 fat

TIP: Tip: The best apple pie filling combines “saucy” apples (that cook down to a saucelike texture) and “shapely” apples (that hold their shape after baking). Pick one variety from each category—here we used McIntosh and Granny Smith. Saucy: McIntosh, Cortland, Macoun, Mutsu (Crispin), Paula Red or Empire. Shapely: Granny Smith, Golden Delicious, Jonathon, Jonagold, Northern Spy or Ida Red.

MAKE AHEAD TIP: Prepare the crust (Step 1), wrap tightly and refrigerate for up to 2 days or freeze for up to 6 months. | Equipment: 9 1/2-inch deep-dish pie pan

Sunday, September 28, 2008

New York Times Chocolate Chip Cookies


Adapted from Jacques Torres

Time: 45 minutes (for 1 6-cookie batch), plus at least 24 hours’ chilling


2 cups minus 2 tablespoons

(8 1/2 ounces) cake flour

1 2/3 cups (8 1/2 ounces) bread flour

1 1/4 teaspoons baking soda

1 1/2 teaspoons baking powder

1 1/2 teaspoons coarse salt

2 1/2 sticks (1 1/4 cups) unsalted butter

1 1/4 cups (10 ounces) light brown sugar

1 cup plus 2 tablespoons (8 ounces) granulated sugar

2 large eggs

2 teaspoons natural vanilla extract

1 1/4 pounds bittersweet chocolate disks or fèves, at least 60 percent cacao content (see note)

Sea salt.


1. Sift flours, baking soda, baking powder and salt into a bowl. Set aside.

2. Using a mixer fitted with paddle attachment, cream butter and sugars together until very light, about 5 minutes. Add eggs, one at a time, mixing well after each addition. Stir in the vanilla. Reduce speed to low, add dry ingredients and mix until just combined, 5 to 10 seconds. Drop chocolate pieces in and incorporate them without breaking them. Press plastic wrap against dough and refrigerate for 24 to 36 hours. Dough may be used in batches, and can be refrigerated for up to 72 hours.

3. When ready to bake, preheat oven to 350 degrees. Line a baking sheet with parchment paper or a nonstick baking mat. Set aside.

4. Scoop 6 3 1/2-ounce mounds of dough (the size of generous golf balls) onto baking sheet, making sure to turn horizontally any chocolate pieces that are poking up; it will make for a more attractive cookie. Sprinkle lightly with sea salt and bake until golden brown but still soft, 18 to 20 minutes. Transfer sheet to a wire rack for 10 minutes, then slip cookies onto another rack to cool a bit more. Repeat with remaining dough, or reserve dough, refrigerated, for baking remaining batches the next day. Eat warm, with a big napkin.

Yield: 1 1/2 dozen 5-inch cookies.

Note: Disks are sold at Jacques Torres Chocolate; Valrhona fèves, oval-shaped chocolate pieces, are at Whole Foods.

Sunday, June 15, 2008

Strawberry Topping and Vanilla Cream


Strawberry Topping

Macerating sliced strawberries in a little sugar creates a flavorful fruity syrup that soaks deliciously into the waffles.

Makes 8 servings

ACTIVE TIME: 10 minutes

TOTAL TIME: 1 hour 40 minutes (including 1 1/2 hours to drain yogurt)

EASE OF PREPARATION: Easy

1 cup Vanilla Cream (recipe follows)
4 cups strawberries, rinsed, hulled and sliced
3 tablespoons sugar

1. Make Vanilla Cream.
2. Combine strawberries and sugar in a medium bowl; toss to coat. Let stand at room temperature until strawberries start to give off juice, 20 to 30 minutes. Top each serving of waffles (or pancakes) with strawberries and a dollop of Vanilla Cream.

NUTRITION INFORMATION: Per serving: 91 calories; 3 g fat (2 g sat, 1 g mono); 10 mg cholesterol; 15 g carbohydrate; 2 g protein; 2 g fiber; 24 mg sodium.

Vanilla Cream

This versatile creamy topping blends the nutritional virtues of yogurt with the luxury of a little whipped cream.

Makes about 1 cup

ACTIVE TIME: 15 minutes

TOTAL TIME: 1 1/4 hours (including 1 hour to drain yogurt)

EASE OF PREPARATION: Easy

1 cup (8 ounces) low-fat or nonfat vanilla yogurt
1/4 cup whipping cream
2 1/2 teaspoons confectioners' sugar (optional)

1. Line a sieve or colander with cheesecloth and set over a bowl, leaving at least 1/2-inch clearance from the bottom. (Alternatively, use a coffee filter lined with filter paper.) Spoon in yogurt, cover and let drain in the refrigerator for 1 hour. Discard whey.
2. Whip cream in a small bowl until soft peaks form. Add sugar, if using, and continue whipping until firm peaks form. Fold in drained yogurt.

NUTRITION INFORMATION: Per tablespoon: 24 calories; 1 g fat (1 g sat, 0 g mono); 5 mg cholesterol; 2 g carbohydrate; 1 g protein; 0 g fiber; 11 mg sodium.

Saturday, July 28, 2007

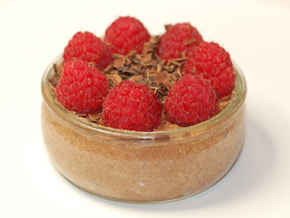
Chocolate Mousse with Raspberries


Nutritional Information
(per serving)
Calories: 145
Protein: 5g
Fat: 9g
- Saturated: 5g
- Cholesterol: 3mg
Carbohydrate: 13g
- Sugars: 10g
Fiber: 2g
Sodium: 52mg

Chocolate is usually not considered a diet food but cocoa itself has beneficial anti-inflammatory properties. It is usually the other ingredients added to chocolate that make it a dieter's foe. This chocolate mousse uses 70% cocoa chocolate this contains much less fat and sugar then a conventional chocolate bar.

Ingredients
(Serves 4) 80g 70% cocoa chocolate
2 egg whites
2 teaspoons sugar
4 tablespoons/70g plain yogurt
30 raspberries (appox 95g)

Break chocolate into a pirex jug and gently heat the jug in saucepan of water. When the chocolate is fully melted take the jug out of the saucepan and allow it to cool for a few minutes.

Separate the egg yokes from the white. Add the sugar to the whites and whisk them until they become firm and form soft peaks as the whisk is removed.

Add the chocolate to the yogurt and mix them together well.

Fold the egg white into the chocolate yogurt and then spoon the mixture into ramekins or what ever bowls or glasses you have to hand. Refrigerate the mixture for 2 hours to allow it to set.
Just before serving arrange the raspberries on top and use a potato peeler to create chocolate shavings for decoration.

Wednesday, July 25, 2007

Pudim de Leite (Brazilian Flan)

1 cup sugar (for the caramel)
1 can sweetened condensed milk
Equal volume of regular milk (use the can to measure)
3 eggs
1 8-inch ring mold

Place 1 to 2 inches of water in a roasting pan. Place the pan in the oven and preheat to 325°.

Put the sugar in the ring mold. Place the mold directly over medium heat. Keep turning the mold until the sugar melts into a golden brown caramel and spoon it up the sides of the mold. Be careful not to burn the sugar and yourself. I use an oven mitt to hold the mold in my left hand and a large spoon for the sugar in my right hand. This way I can keep turning the mold and spooning the sugar. Let the mold cool.

Combine the condensed milk, regular milk and eggs in a blender. Whip (I like to use the frappe button in my blender) until smooth. Pour this mixture into the mold and place it in the center of the roasting pan with water. Bake the pudim for about 1 hour. It will turn golden brown on top and start separating from the sides of the mold. Let it cool to room temperature and place in refrigerator, preferably overnight (at least 6 hours).

Just before serving, run the tip of a knife around the inside of the mold. Place a deep platter over the mold and invert: the pudim should slide out easily. If not, give the mold a firm but careful shake. Spoon the caramel sauce on top and serve. Serves about 10. Totally yummy!

From: http://www.maria-brazil.org/pudim.htm

Docinhos de Nozes (Walnut Sweet)

One more party recipe, also easy to make (the ones on the left on this photograph). Don't forget to get pretty paper cups for these too! Better stock up on those, there are so many similar recipes...

1 can sweetened condensed milk
1/2 lb finely chopped walnuts
2 Tbsp of unsalted butter or tub margarine (you can use only 1 Tbsp and it will still work out)
2 heaping Tbsp of Nestlé Quick or 1 Tbsp of Quick and 1 of Hershey's Cocoa. (Toddy)

In a heavy saucepan mix chocolate with condensed milk and nuts and add the margarine. Cook in low heat stirring constantly until you can see the bottom of the pan. Continue to stir for another two minutes. Pour onto a plate and let cool completely before you form the little balls (I usually leave it in the cupboard until next day). Butter your hands slightly to form the little balls. To finish, you can either roll the balls in chocolate powder or jimmies and put them in small paper cups or melt chocolate and coat the balls and top with a walnut.

From: http://www.maria-brazil.org/docinho_de_nozes.htm

Thursday, April 5, 2007

Darkest Chocolate Crepe Cake

From:http://www.marthastewart.com/

Cake Ingredients:
3/4 Cup (1 1/2 sticks) cold unsalted butter, cut into pieces, plus melted for pan
8 Ounces semisweet chocolate, finely chopped
1 1/2 Cups all-purpose flour
1/3 Cup sugar
1/2 Teaspoon salt
2 1/2 Cups whole milk, room temperature
6 large eggs, room temperature
1 Tablespoon pure vanilla extract
Hazelnut Filling (See Below for Recipe)
Chocolate Glaze (See Below for Recipe)
Candied Hazelnuts (See Below for Recipe)

Method:
1. Bring 1/4 cup water to a rolling boil in a small saucepan over medium-high heat. Add butter, 1 piece at a time, whisking to combine after each addition. Remove from heat; stir in chocolate until completely melted. Set aside.
2. Whisk together flour, sugar, and salt in a medium bowl. Whisk together milk, eggs, and vanilla in another medium bowl. Gradually add milk mixture to flour mixture, whisking until smooth. Add chocolate-butter mixture, whisking until smooth. Pour through a fine sieve into an airtight container; discard lumps. Refrigerate at least 2 hours or up to overnight.
3. Lightly coat an 8-inch crepe pan or nonstick skillet with melted butter. Heat over medium heat until just starting to smoke. Remove pan from heat; pour about 2 tablespoons batter into pan, swirling to cover bottom. Reduce heat to medium-low; return pan to heat. Cook, flipping once, until edges are golden and center is dry, about 30 seconds per side.
4. Slide crepe onto a plate. Repeat process with remaining batter, coating pan with butter as needed. Crepes can be refrigerated, covered, up to 1 day.
5. Place a crepe on a wire rack set over a rimmed baking sheet. Spread with about 3 tablespoons hazelnut filling. Top with another crepe. Continue layering with hazelnut filling and crepes, using about 32 crepes and ending with a crepe on top. Refrigerate until firm, about 15 minutes.
6. Spoon 1/2 cup glaze on top of the cake, spreading to edges. Spread remaining glaze around sides of cake, coating completely. Refrigerate until glaze is firm and set, about 20 minutes. Cake can be refrigerated up to 3 days. Garnish with toasted and candied hazelnuts.

Hazulnut Filling Ingredients:
2/3 Cup heavy cream
6 large egg whites
1 2/3 Cups sugar
1 3/4 Cups (3 1/2 sticks) unsalted butter cut into pieces, softened
1 Teaspoon pure vanilla extract
1/3 Cup hazelnut cream (available from Whole Foods Market, www.wholefoods.com)
pinch of salt

Method:
1. Put cream into the bowl of an electric mixer fitted with the whisk attachment; beat on medium-high speed until soft peaks form, about 4 minutes. Transfer to a medium bowl. Refrigerate 1 hour.
2. Whisk egg whites and sugar in the clean bowl of mixer set over a pan of simmering water until sugar has dissolved and mixture registers 160 degrees;, 2 to 3 minutes.
3. Attach bowl to mixer fitted with the clean whisk attachment; beat on high speed until slightly cooled and stiff (but not dry) peaks form, about 5 minutes.
4. Fit mixer with paddle attachment. With mixer on medium-low speed, add butter, several pieces at a time, mixing well after each addition (meringue will deflate slightly as butter is added). Add vanilla, hazelnut cream, and salt; mix until mixture comes together, 3 to 5 minutes. Fold in whipped cream with a rubber spatula. Use immediately.

Chocolate Glaze Ingredients:
1 1/4 Cups heavy cream
1 Tablespoon light corn syrup
1 salt 10 Ounces semisweet chocolate finely chopped

Method:
1. Bring cream, corn syrup, and salt to a boil in a medium, heavy saucepan over medium- medium-high heat. Remove from heat. Add chocolate; swirl pan to cover completely with cream. Let stand about 5 minutes. Stir until smooth. Let cool completely.

Candied Hazelnuts Ingredients:
9 hazelnuts, toasted and peeled
1 Cup sugar

Method:
1. Thread each hazelnut onto tip of a long wooden skewer; set aside. Place a cutting board along the edge of a countertop; set a baking sheet on floor next to edge.
2. Cook sugar and 1/4 cup water in a medium, heavy saucepan over medium heat, stirring occasionally, until sugar has dissolved. Continue to cook, without stirring, until syrup comes to a boil, washing down sides with a wet brush to prevent crystals from forming. Let boil until syrup turns light amber, about 5 minutes; remove from heat. Let stand until slightly cooled, 8 to 10 minutes.
3. Dip 1 skewered hazelnut into syrup, coating completely and letting excess syrup drip back into pan. When dripping syrup becomes a thin string, secure end of skewer under cutting board, letting caramel string drip over edge onto sheet. Repeat with remaining hazelnuts. Let stand until caramel has hardened, about 5 minutes. Break strings to about 4 inches. Carefully remove skewers.